 |
||||
|
Xin Cube Home > Articles > Xin Invoice 3.0 User Guide > Email Format
|
||
|
Getting Started Company Information Definition Add New Company Open Company Update Company Delete Company Add Company Logo Remove Company Logo Set System Data Default Document Setting Payment Terms Inventory Category Tax Reference Code Email Format Setup Email Server Personal Preference Inventory Database Definition Add new Inventory Update Inventory Delete Inventory Add Inventory Photo Remove Inventory Photo Import Inventory Export Inventory Customer Database Definition Add new Customer Update Customer Delete Customer Add Customer Photo Remove Customer Photo Import Customer Export Customer Sales Person Database Definition Add new Sales Person Update Sales Person Delete Sales Person Add Sales Person Photo Remove Sales Person Photo Add Sales Person Signature Remove Sales Person Signature Import Sales Person Export Sales Person Quotation Definition Draft Quotation Generate Quotation Update Quotation Delete Quotation Duplicate Quotation Customize Template Invoice Definition Draft Invoice Generate Invoice Update Invoice Delete Invoice Duplicate Invoice Import From Quotation Generate Delivery Note Receive Payment Recurring Invoice Customize Template Credit Note Definition Draft Credit Note Generate Credit Note Update Credit Note Delete Credit Note Duplicate Credit Note Import From Invoice Customize Template Security Set Password Data Backup |
Email FormatInstead of export your Invoice, Quotation, Delivery Note, Credit Note or Customer Statement and send to your customer manually, you can send the document out to your customer directly from Xin Invoice 3.0 program. You can define the standard email template and use it repeatedly.1. In Xin Invoice 3.0 program, click on "Setting" tab. On the top menu, click on the drop down button under "Email", then choose "Email Template". 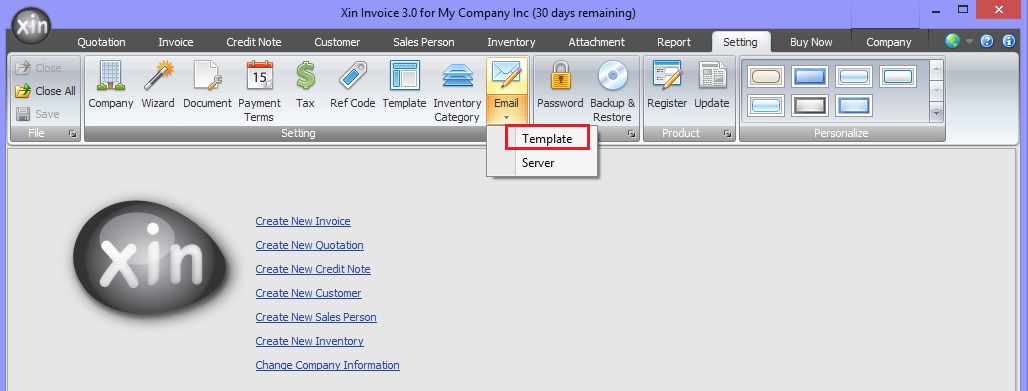 2. You can set different email format for Invoice, Quotation, Credit Note, Delivery Note and Statement. 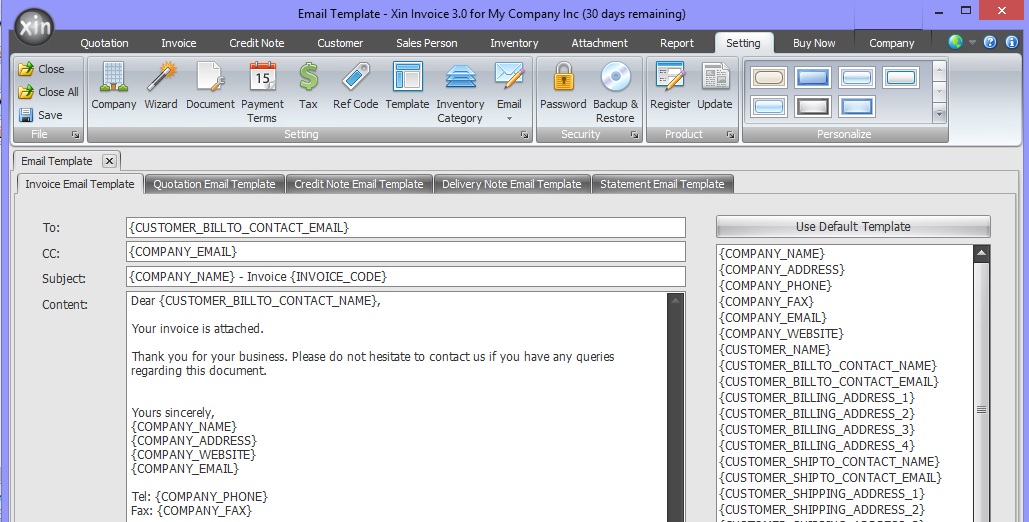 3. The keyword is those text with the bracket {KEY-CODE} and it will be replaced with the actual value when you generate your email. 4. Example, to enter Invoice Due Date information to your email, first focus your mouse cursor on the part of the Content where you want to place the Invoice Due Date information. Then select {INVOICE_DUE_DATE} from the fields panel, click button "Insert Field". 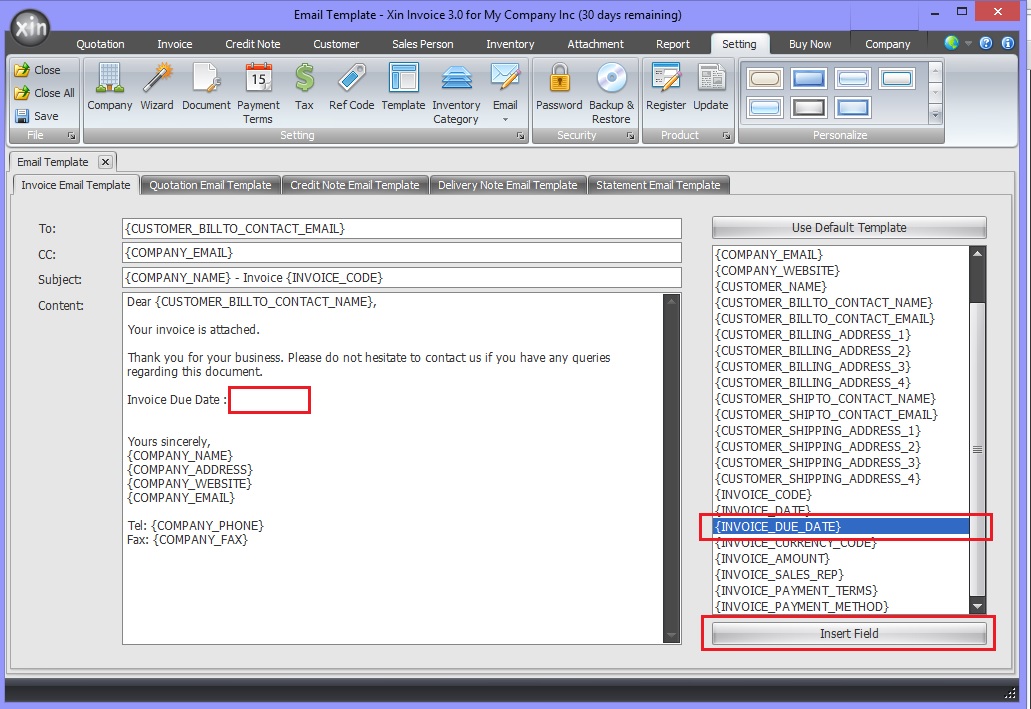 5. The keyword {INVOICE_DUE_DATE} inserted to the desired place, click button "Save" on the top menu. 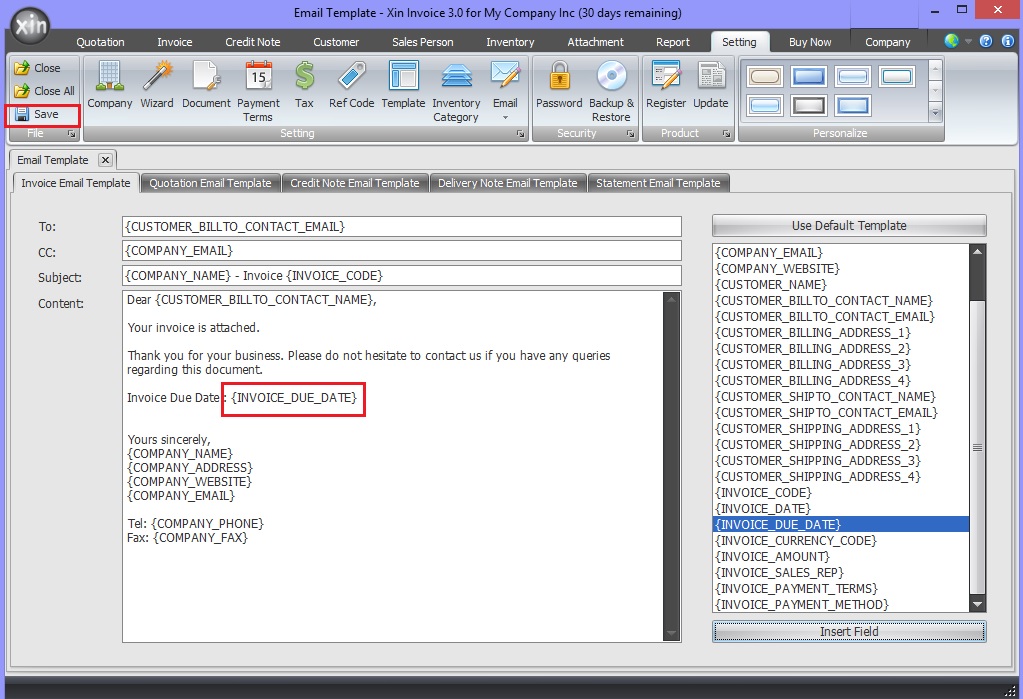 6. Open an Invoice, click on "Print Inv" button on the top menu. 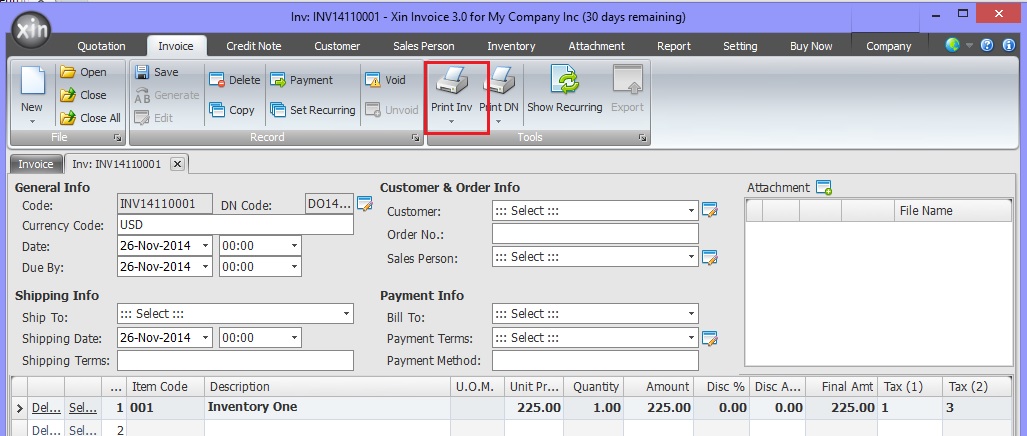 7. In the Invoice preview page, click on "Email" icon. 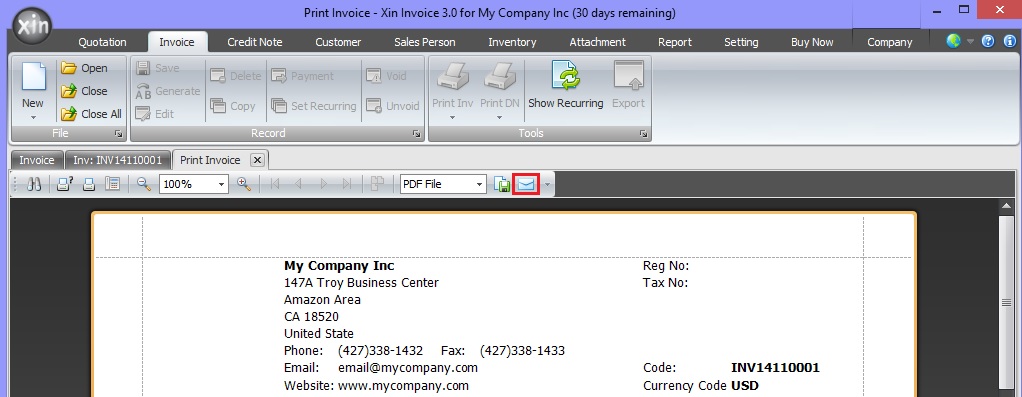 8. The Invoice Due Date has been included in the email content. 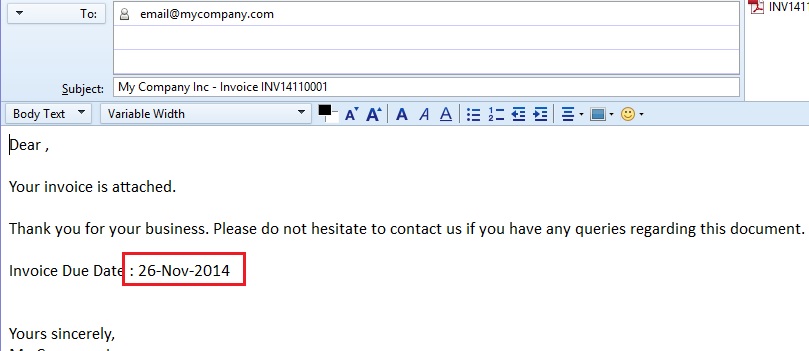 Next : Click here to learn how to configure Email Server >> |
|
| Contact Us | For all Support issues, please use our online ticketing system. | Email Us | E-mail us anytime at
and we'll help. Please give us a few business days to respond! Thanks! |
Copyright © xincube 2009 ALL RIGHTS RESERVED. www.xincube.com